Hyundai Venue: Cooling System / Radiator. Repair procedures
Hyundai Venue (QX) (2020-2025) Service Manual / Engine Mechanical System / Cooling System / Radiator. Repair procedures
| Removal and Installation |
|

| 1. |
Disconnect the battery negative terminal.
|
| 2. |
Drain the coolant.
(Refer to Cooling System - "Coolant")
|
| 3. |
Remove the cooling fan assembly.
(Refer to Cooling System - "Cooling Fan")
|
| 4. |
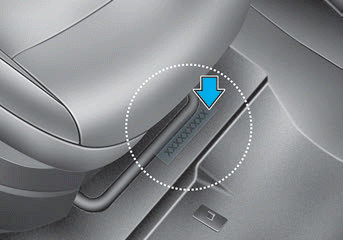
Disconnect the radiator lower hose (A).
|

| 5. |
Separate the A/C condenser from the radiator and Remove the radiator
(A) from the vehicle.
|
| 6. |
Install in the reverse order of removal.
|
| 7. |
Fill with engine coolant.
(Refer to Cooling System - "Coolant")
|

| 8. |
Start engine and check for leaks.
|
| Inspection |
Radiator Cap Testing
| 1. |
Remove the radiator cap, wet its seal with engine coolant, then install
it on a pressure tester.
|
| 2. |
Apply a pressure of 93.16-122.58kpa (0.95-1.25kg/cm², 13.51-17.78psi).
|
| 3. |
Check for a drop in pressure.
|
| 4. |
If the pressure drops, replace the cap.
|
Radiator Leakage Test
| 1. |
Wait until engine is cool, then carefully remove the radiator cap and
fill the radiator with engine coolant, then install it on the pressure
tester.
|
| 2. |
Apply a pressure tester to the radiator and apply a pressure of 93.16-122.58kpa
(0.95-1.25kg/cm², 13.51-17.78psi).
|
| 3. |
Inspect for engine coolant leaks and a drop in pressure.
|
| 4. |
Remove the tester and reinstall the radiator cap.
|

 Cooling Fan. Repair procedures
Removal and Installation
Cooling Fan Assembly
1.
Disconnect the battery negative terminal.
2.
Remove the air duct...
 Water Temperature Control Assembly. Repair procedures
Removal and Installation
1.
Disconnect the battery negative terminal.
2.
Loosen the drain plug, and drain the engine coolant...
Other information:
Hyundai Venue (QX) (2020-2025) Service Manual: Power Door Mirror Switch. Repair procedures
INSPECTION 1. Remove the front left door trim. (Refer to Body - "Front Door Trim") 2. Disconnect the mirror connector. 3. Check for continuity between the terminals in each switch position according to the table...
Hyundai Venue (QX) (2020-2025) Service Manual: Evaporator Temperature Sensor. Repair procedures
Inspection 1. Turn the ignition switch OFF. 2. Disconnect the evaporator temperature sensor connector. 3. Measure the resistance between terminal "+" and "-" of the evaporator temperature sensor...
Categories
- Manuals Home
- 1st Generation Venue Owners Manual
- 1st Generation Venue Service Manual
- To set Cruise Control speed
- Type B, C
- Check Tire Pressure
- New on site
- Most important about car
Vehicle Identification Number (vin), Vehicle Certification Label
Vehicle Identification Number (vin)
Frame number

Copyright © 2025 www.hvenueqx.com