Hyundai Venue (QX): Maintenance / Air Cleaner
Filter Replacement
The air cleaner filter can be cleaned for inspection using compressed air.
Do not attempt to wash or to rinse it, as water will damage the filter.
If soiled, the air cleaner filter must be replaced.
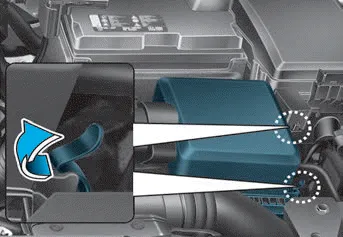
1. Loosen the air cleaner cover attaching clips and open the cover.
2. Wipe the inside of the air cleaner.
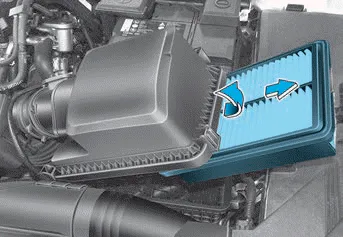
3. Replace the air cleaner filter.
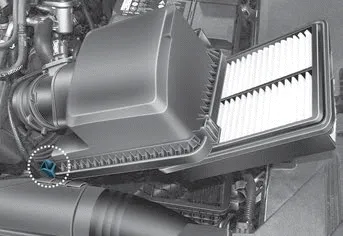
4. Lock the cover with the cover attaching clips.
5. Check that the cover is firmly installed.
Information
If the vehicle is operated in extremely dusty or sandy areas, replace the element more often than the usual recommended intervals (refer to “Maintenance Under Severe Usage Conditions” in this chapter).
NOTICE
- Do not drive with the air cleaner filter removed. This will result in excessive engine wear.
- When removing the air cleaner filter, be careful that dust or dirt does not enter the air intake, or damage may result.
- Use HYUNDAI genuine parts. Use of non-genuine parts could damage the air flow sensor.
Checking the Parking Brake Check the stroke of the parking brake by counting the number of “clicks” heard while fully applying it from the released position.
Filter Inspection The climate control air filter should be replaced according to the Maintenance Schedule. If the vehicle is operated in severely air-polluted cities or on dusty rough roads for a long period, it should be inspected more frequently and replaced earlier.
Other information:
Hyundai Venue (QX) (2020-2026) Service Manual: Description and operation
Description Rear view camera will activate when the backup light is ON with the ignition switch ON and the shift lever in the R position. This system is a supplemental system that shows behind the vehicle through the AV monitor or the ECM (Reverse Display Room Mirror) mirror while backing-up.
Hyundai Venue (QX) (2020-2026) Service Manual: Cruise Control (CC) Switch. Repair procedures
Inspection 1. Loosen the cruise control switch connector. 2. Check for resistance between terminals in each switch position. Switch Connector terminal Resistance (±5%) Cancel
Categories
- Manuals Home
- Hyundai Venue Owners Manual
- Hyundai Venue Service Manual
- Body (Interior and Exterior)
- Electronic Stability Control (ESC)
- Battery. Specifications
- New on site
- Most important about car
