Hyundai Venue (QX): Mirrors / Side View Mirrors
Make sure to adjust the side view mirrors to your desired position before you begin driving.
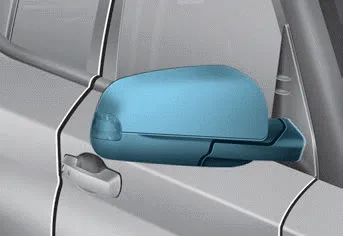
Your vehicle is equipped with both left-hand and right-hand side view mirrors. The mirrors can be adjusted remotely with the remote switch. The side view mirrors can be folded to help prevent damage when going through an automatic car wash or when passing through a narrow street.
The right side view mirror is convex. Objects seen in the mirror are closer than they appear.
Use the inside rear view mirror or look back directly to determine the actual distance of other vehicles prior to changing lanes.
WARNING
Do not adjust or fold the side view mirrors while driving. This may cause loss of vehicle control resulting in an accident.
NOTICE
- Do not scrape ice off the mirror face; this may damage the surface of the glass.
- If the mirror is jammed with ice, do not adjust the mirror by force. Use an approved spray de-icer (not radiator antifreeze) spray, or a sponge or soft cloth with very warm water, or move the vehicle to a warm place and allow the ice to melt.
Side View Mirror Adjustment
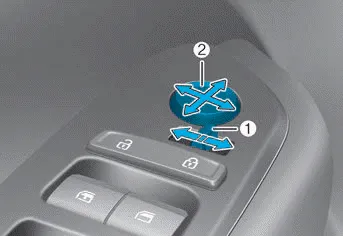
Adjusting the side view mirrors:
1. Press either the L (driverŌĆÖs side) or R (passengerŌĆÖs side) button (1) to select the side view mirror you would like to adjust.
2. Use the mirror adjustment control switch to position the selected mirror up, down, left or right.
3. After adjustment, put the button into neutral (center) position to prevent inadvertent adjustment.
NOTICE
- The mirrors stop moving when they reach the maximum adjusting angles, but the motor continues to operate while the switch is pressed. Do not press the switch longer than necessary, because this can damage the motor.
- Do not attempt to adjust the side view mirrors by hand, because this can damage the motor.
Folding the side view mirrors
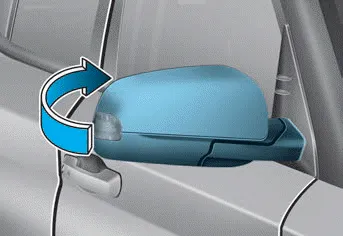
To fold the side view mirrors, grasp the housing of the mirror and then fold it inwards.
Inside Rearview Mirror Before driving your vehicle, check to see that your inside rearview mirror is properly positioned. Adjust the rearview mirror so that the view through the rear window is properly centered.
(1) DriverŌĆÖs door power window switch (2) Front passengerŌĆÖs door power window switch (3) Rear door (left) power window switch (4) Rear door (right) power window switch (5) Window opening and closing (6) Automatic power window (7) Power window lock switch
Other information:
Hyundai Venue (QX) (2020-2026) Service Manual: Receiver-Drier. Repair procedures
Replacement 1. Remove the condenser. 2. Remove the cap (A) on the bottom of the condenser with a L wrench. Tightening torque : 9.81 - 14.71 N.m (1.
Hyundai Venue (QX) (2020-2026) Service Manual: Blower Unit. Components and components location
Component Location 1. Blower unit assembly Component Location 1. Intake seal 2. Intake upper case 3. Intake actuator 4. Intake door 5. Intake lower case 6. Blower pad 7.
Categories
- Manuals Home
- Hyundai Venue Owners Manual
- Hyundai Venue Service Manual
- Engine Coolant
- Tire Pressure Monitoring System (TPMS) (Type A)
- Child-Protector Rear Door Locks
- New on site
- Most important about car
