Hyundai Venue: Master Cylinder / Repair procedures
| Removal |
| 1. |
Turn ignition switch OFF and disconnect the negative (-) battery cable.
|
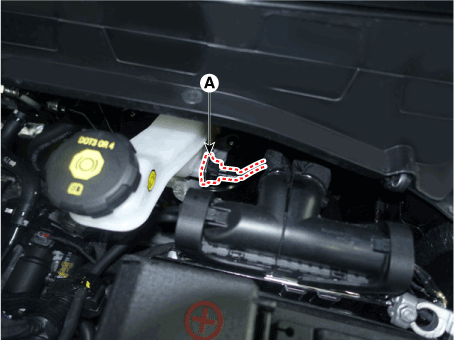
| 2. |
Disconnect the brake fluid level sensor connector (A).
|
| 3. |
Remove the brake fluid from the master cylinder reservoir with a syringe.
|

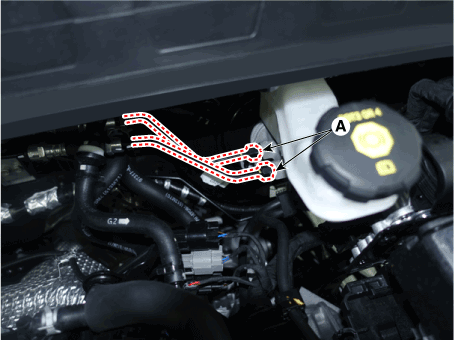
| 4. |
Separate the brake tube (A) from the master cylinder by loosening the
tube flare nut.
|
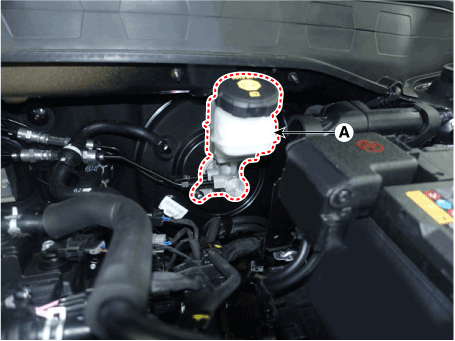
| 5. |
Remove the master cylinder (A) after loosening the master cylinder nuts.
|
| Installation |
| 1. |
Install in the reverse order of removal.
|
| 2. |
After installation, bleed the brake system.
(Refer to Brake System - "Brake Bleeding Prcoedures")
|
| 3. |
Check the brake oil leakage and pedal operating condition.
|

 Brake Line
..
Other information:
Hyundai Venue (QX) (2020-2025) Service Manual: Repair procedures
Removal 1. Remove the manual transaxle assembly. (Refer to Manual Transaxle System - "Manual Transaxle") 2. Remove the clutch cover assembly after loosening the bolts. • Be careful not to be bent or twist bolts...
Hyundai Venue (QX) (2020-2025) Owners Manual: Theft-Alarm System
This system helps to protect your vehicle and valuables. The horn will sound and the hazard warning lights will blink continuously if any of the following occur: -- A door is opened without using the remote key or smart key. -- The liftgate is opened without using the remote key or smart key...
Categories
- Manuals Home
- 1st Generation Venue Owners Manual
- 1st Generation Venue Service Manual
- Lighting control
- Liftgate
- Type B, C
- New on site
- Most important about car
Fuel gauge
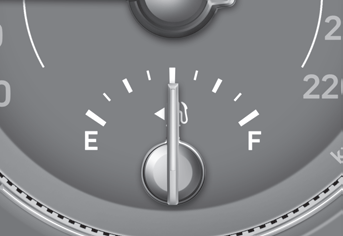
This gauge indicates the approximate amount of fuel remaining in the fuel tank.
Information
The fuel tank capacity is given in chapter 2. The fuel gauge is supplemented by a low fuel warning light, which will illuminate when the fuel tank is nearly empty. On inclines or curves, the fuel gauge pointer may fluctuate or the low fuel warning light may come on earlier than usual due to the movement of fuel in the tank.
Copyright © 2025 www.hvenueqx.com