Hyundai Venue: Driveshaft Assembly / TJ Joint. Repair procedures
Hyundai Venue (QX) (2020-2025) Service Manual / Driveshaft and axle / Driveshaft Assembly / TJ Joint. Repair procedures
| Disassembly |
|

| 1. |
Remove the Front Driveshaft.
(Refer to Driveshaft Assembly - "Front Driveshaft")
|
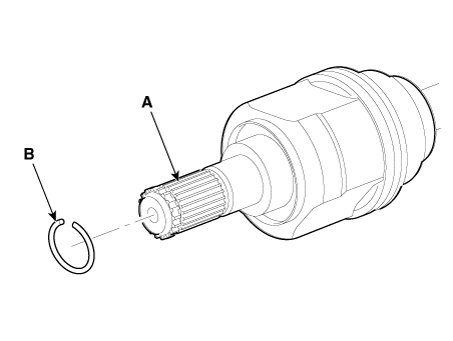
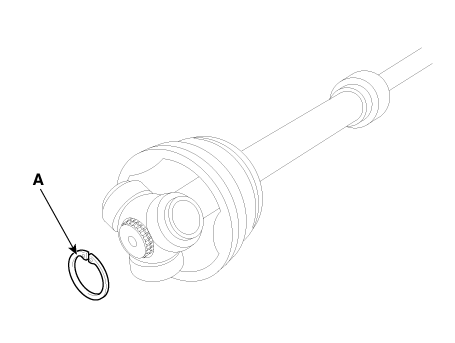
| 2. |
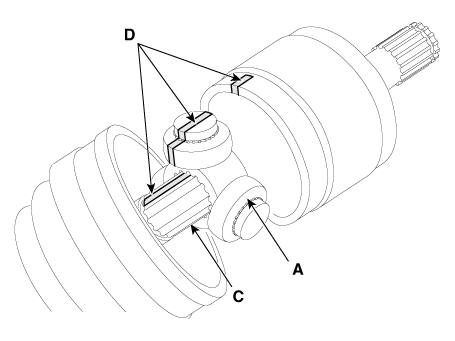
Remove the housing circlip (B) from the driveshaft spline (A).
|
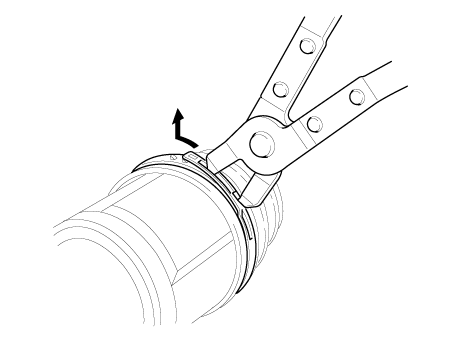
| 3. |
Remove both boot bands from the TJ housing.
|

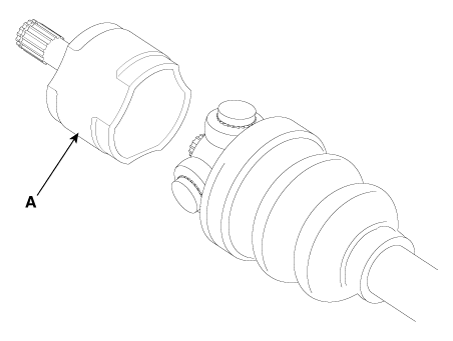
| 4. |
Remove the TJ housing (A).
|

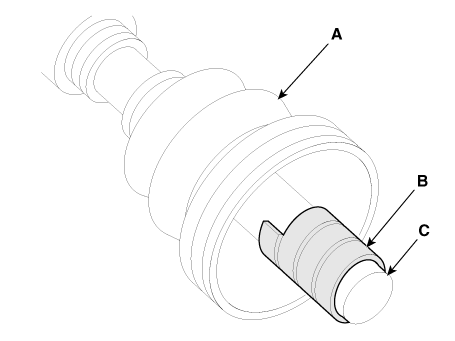
| 5. |
Remove the snap ring (A) from the shaft.
|
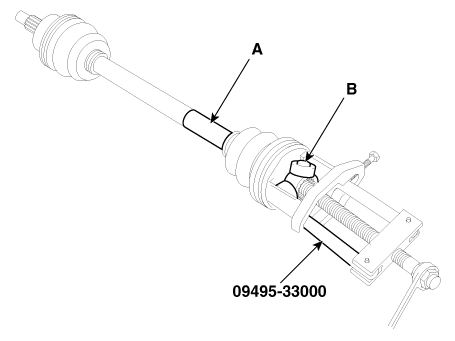
| 6. |
Remove the spider assembly (B) from the driveshaft (A) using the special
tool SST (09495-33000).
|
| 7. |
Clean the spider assembly.
|
| 8. |
Remove the TJ boot (A).
|

| Inspection |
| 1. |
Check the driveshaft boots for damage and deterioration.
|
| 2. |
Check the driveshaft spline for wear or damage.
|
| 3. |
Check that there is no water or foreign material in the joint.
|
| 4. |
Check the spider assembly for roller rotation, wear or corrosion.
|
| 5. |
Check the groove inside the joint case for wear or corrosion.
|
| 6. |
Check the dynamic damper for damage or cracks.
|
| Reassembly |
| 1. |
Wrap tape around the driveshaft spline(TJ) to prevent damage to the
boot.
|
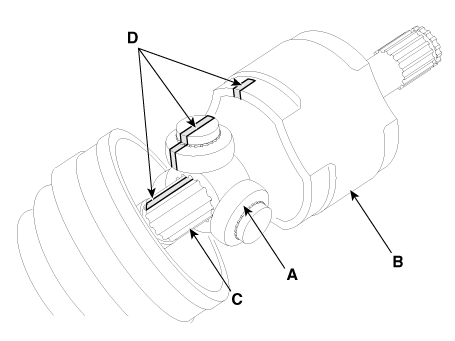
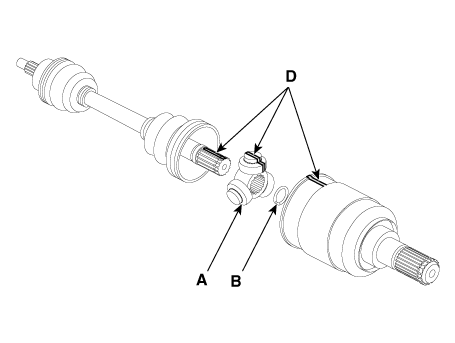
| 2. |
Using the alignment marks (D) made during disassembly as a guide, install
the spider assembly (A) and snap ring (B) on the driveshaft splines
(C).
|
| 3. |
Add specified grease to the joint boot as much as it was wiped away
at inspection.
|
| 4. |
Install the both boot band.
|
| 5. |
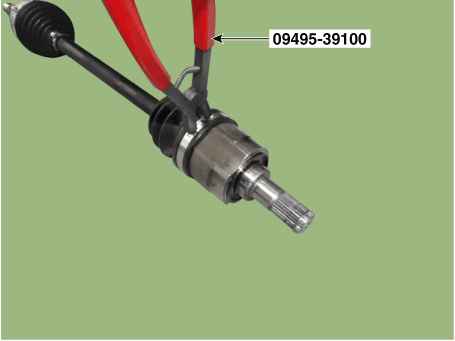
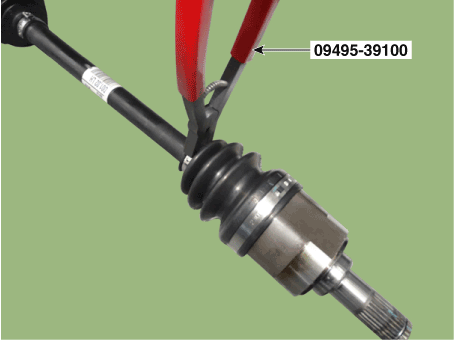
Using the SST (09495-39100), secure the TJ boot bands.
|

| 6. |
Install the front driveshaft.
(Refer to Driveshaft Assembly - "Front Driveshaft")
|
| 7. |
Check the front alignment.
(Refer to Suspension System - "Front Alignment")
|
 TJ Joint. Components and components location
Components
[RH]
1. BJ assembly
2. BJ circlip
3. BJ boot band
4. BJ boot
5. Dynamic damper
6...
 BJ Boot. Components and components location
Components (1)
1. BJ assembly
2. BJ circlip
3. BJ boot band
4. BJ boot
5. Dynamic damper
6. Shaft
7...
Other information:
Hyundai Venue (QX) (2020-2025) Owners Manual: Remote Key
Your HYUNDAI uses a remote key, which you can use to lock or unlock the driver and passenger doors or the rear liftgate. (1) Door Lock (2) Door Unlock (3) Panic Locking Your Vehicle To lock your vehicle: 1. Make sure all doors, the engine hood and the liftgate are closed...
Hyundai Venue (QX) (2020-2025) Service Manual: Rear Wiper Motor. Repair procedures
Inspection Rear Wiper Motor 1. Remove the connector from the rear wiper motor. 2. Connect battery positive (+) and negative (-) cables to terminals 2 and 1 respectively. 3...
Categories
- Manuals Home
- 1st Generation Venue Owners Manual
- 1st Generation Venue Service Manual
- Electronic Stability Control (ESC)
- Operating Door Locks from Outside the Vehicle
- Remote start
- New on site
- Most important about car
Vehicle Identification Number (vin), Vehicle Certification Label
Vehicle Identification Number (vin)
Frame number

Copyright © 2025 www.hvenueqx.com