Hyundai Venue: Manual Transaxle System / Repair procedures
| 1. |
Turn OFF ignition switch and disconnect the negative (-) battery cable.
|
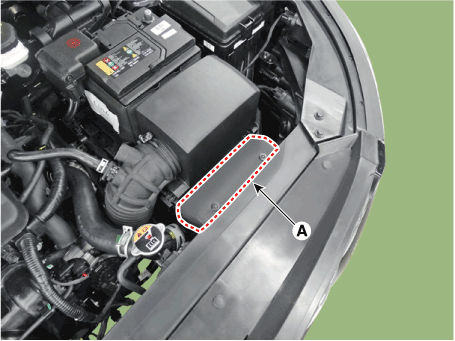
| 2. |
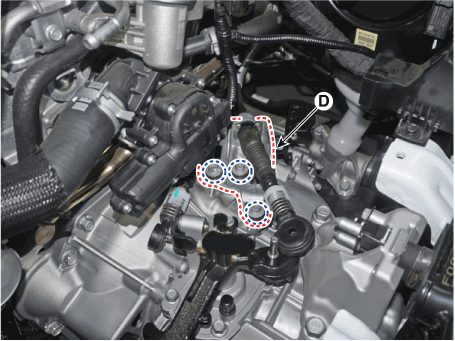
Remove the air cleaner and air duct.
| (1) |
Remove the air duct (A).
|
| (2) |
Disconnect the breather hose (B) and air intake hose (C).
|
| (3) |
Remove the air cleaner assembly (D).
|
Tightening torque :
Hose clamp bolt (C):
2.9 - 4.9 N.m (0.3 - 0.5 kgf.m, 2.1 - 3.6 lb-ft)
Air cleaner assembly bolts (D) :
3.9 - 5.9 N.m (0.4 - 0.6 kgf.m, 2.9 - 4.3 Ib-ft)
|

|
|
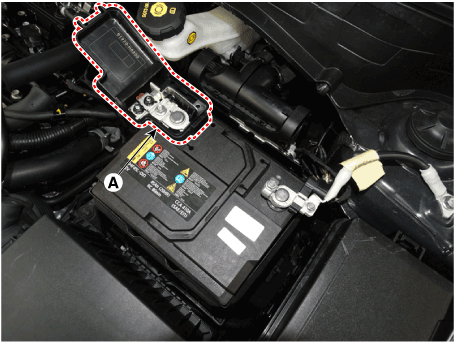
| 3. |
Remove the battery (+) terminal (A).
|
Tightening torque :
7.8 - 9.8 N.m (0.8 - 1.0 kgf.m, 5.8 - 7.2 lb-ft)
|
|
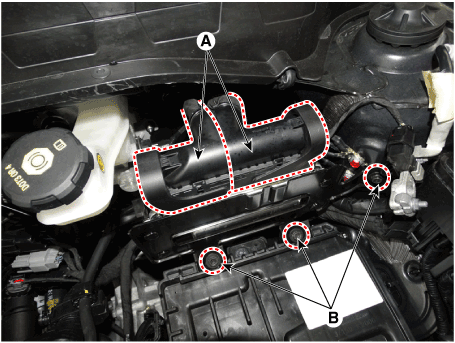
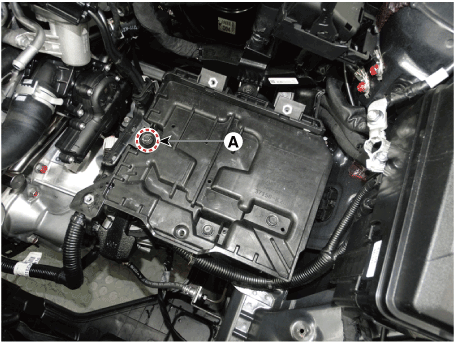
| 4. |
Remove the battery mounting bracket (A) and the battery (B).
|
Tightening torque :
9.0 - 14.0 N.m (0.9 - 1.4 kgf.m, 6.6 - 10.3 Ib-ft)
|
|
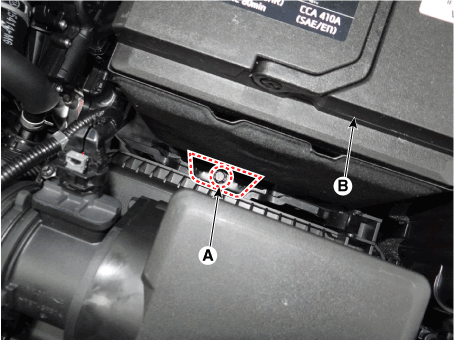
| 5. |
Remove the ECM.
| (1) |
Disconnect the ECM connector (A).
|
| (2) |
Loosen the mounting bolts (B) and then removing the ECM bracket
assembly.
|
|
Tightening torque :
9.8 - 11.8 N.m (1.0 - 1.2 kgf.m, 7.2 - 8.7 lb-ft)
|
|
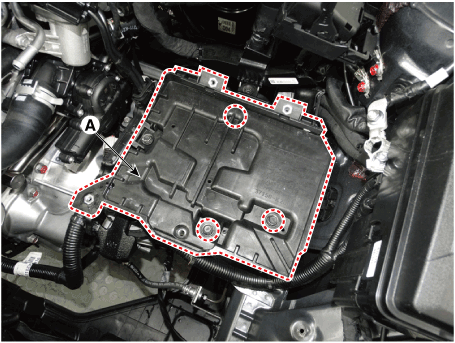
| 6. |
Remove the battery tray.
| (1) |
Loosen the mounting bolt (A) and then removing the battery (+)
terminal bracket.
|
Tightening torque :
8.0 - 10.0 N.m (0.8 - 1.0 kgf.m, 5.9 - 7.4 lb-ft)
|
|
| (2) |
Loosen the bolts and then removing the battery tray (A).
|
Tightening torque :
8.8 - 13.7 N.m (0.9 - 1.4 kgf.m, 6.5 - 10.1 Ib-ft)
|
|
|
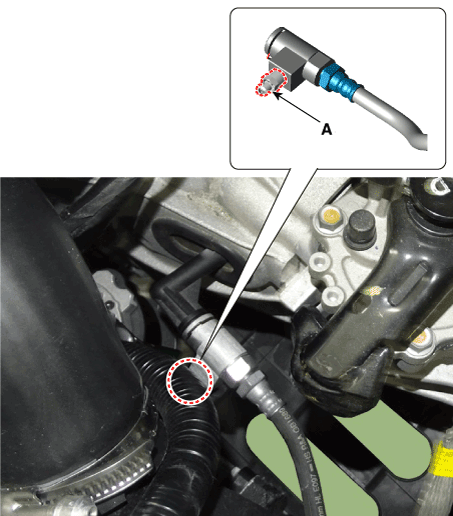
| 7. |
Disconnect the back-up lamp switch connector (A).
|
| 8. |
Remove the control cable bracket and control cable.
| 1) |
Remove the snap pin (A) and then separate the select cable (B)
and shift cable (C).
|
| 2) |
Loosen the mounting bolts and then removing the control cable
bracket (D).
|
|
Tightening torque :
14.7 - 21.6 N.m (1.5 - 2.2 kgf.m, 10.8 - 15.9 lb-ft)
|
|
| 9. |
Loosen the ground line bolt (A).
|
Tightening torque :
9.8 - 11.8 N.m (1.0 - 1.2 kgf.m, 7.2 - 8.7 lb-ft)
|
|
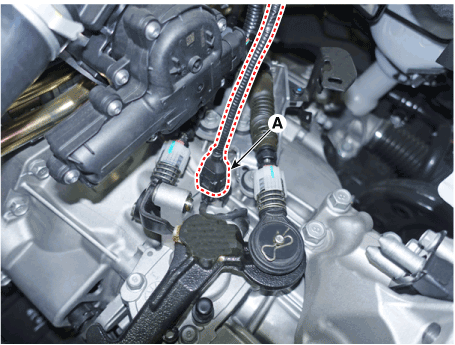
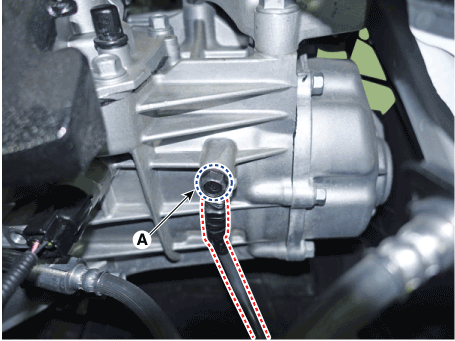
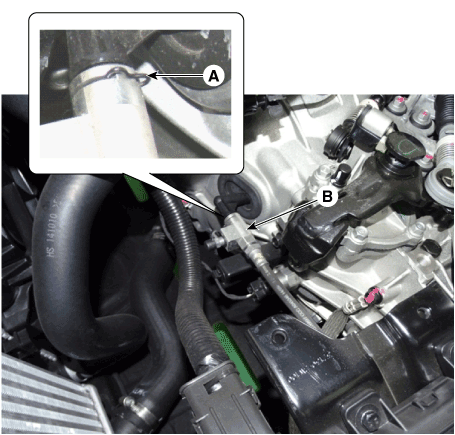
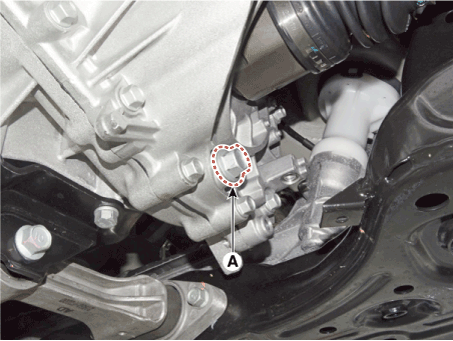
| 10. |
Remove the clip (A) and then separate the clutch hose (B).
|
| 11. |
Loosen the starter mounting bolts (A) and the transaxle upper mounting
bolts (B).
|
Tightening torque :
(A) 49.0 - 63.7 N.m (5.0 - 6.5 kgf.m, 36.2 - 47.0 lb-ft)
(B) 42.2 - 53.9 N.m (4.3 - 5.5 kgf.m, 31.1 - 39.8 lb-ft)
|
|
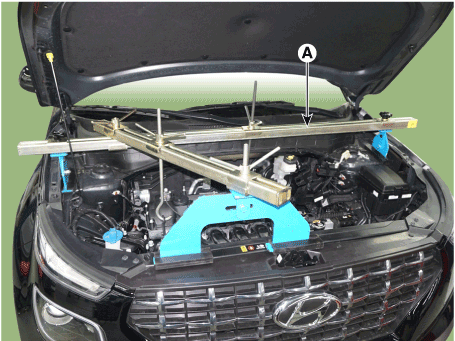
| 12. |
Assemble the engine support fixture(beam No.: 09200-38001 or 09200-3N000,
supporter No.: 09200-2S000).
|
| 13. |
Using the engine support fixture (A), hold the engine and transaxle
assembly safely.
|
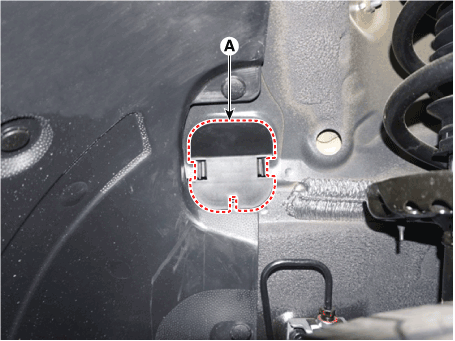
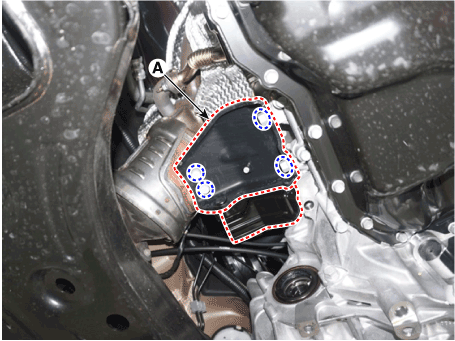
| 14. |
Remove the dust cover (A).
|
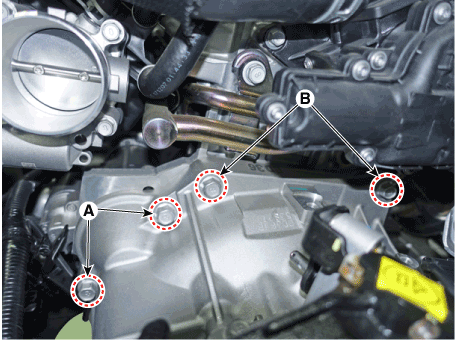
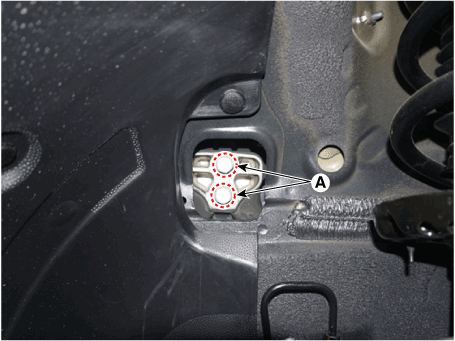
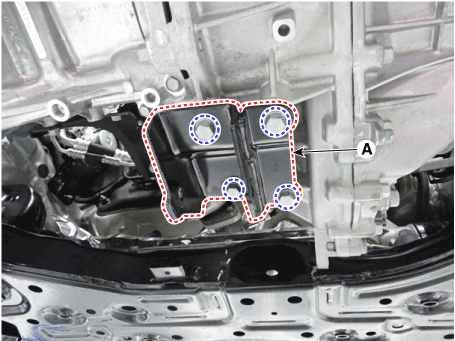
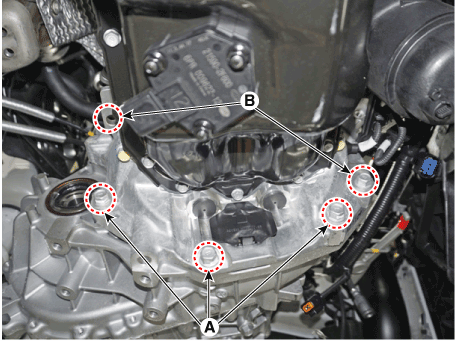
| 15. |
Remove the transaxle support bracket mounting bolts (A).
|
Tightening torque :
88.3 - 107.9 N.m (9.0 - 11.0 kgf.m, 65.1 - 79.6 lb-ft)
|
|
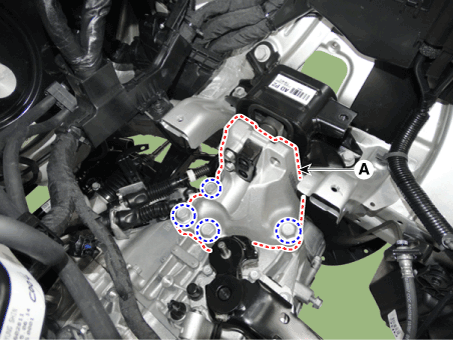
| 16. |
Remove the transaxle support bracket (A).
|
Tightening torque :
58.9 - 78.5 N.m (6.0 - 8.0 kgf.m, 43.4 - 57.8 lb-ft)
|
|
| 17. |
Remove the under cover.
(Refer to Engine Mechanical System - "Engine Room Under Cover")
|
| 18. |
Loosen the oil drain plug (A), and then drain the fluid.
|
Tightening torque :
58.9 - 78.5 N.m (6.0 - 8.0 kgf.m, 43.4 - 57.8 lb-ft)
|
|
| 19. |
Remove the front drive shaft assembly.
(Refer to Driveshaft and axle - "Front Drive Shaft")
|
| 20. |
Loosen the roll rod bracket bolts (A), (B) and then removing the roll
rod bracket (C).
|
Tightening torque :
(A) 49.0 - 63.7 N.m (5.0 - 6.5 kgf.m, 36.2 - 47.0 lb-ft)
(B) 107.9 - 127.5 N.m (11.0 - 13.0 kgf.m, 79.6 - 94.1 lb-ft)
|
|
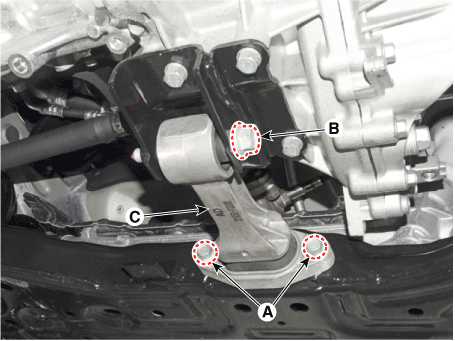
| 21. |
Remove the roll rod support bracket (A).
|
Tightening torque :
49.0 - 68.6 N.m (5.0 - 7.0 kgf.m, 36.2 - 50.6 lb-ft)
|
|
| 22. |
Loosen the bolts and then removing the exhaust manifold stay assembly
(A).
|
| 23. |
Loosen the lower mounting bolts (A) and (B) of lower part of the transaxle,
and the left side cover and remove the transaxle assembly by supporting
it with a jack.
|
Tightening torque :
(A) 42.2 - 48.1 N.m (4.3 - 4.9 kgf.m, 31.1 - 35.4 lb-ft)
(B) 42.2 - 53.9 N.m (4.3 - 5.5 kgf.m, 31.1 - 39.8 lb-ft)
|
| •
|
Be careful not to damage other system or parts near
by when removing the engine and transaxle assembly.
|
|
|
| 1. |
To install, reverse the removal procedures.
|
| • |
If the oil seal on the transaxle case side is damaged and fluid
is leaking, replace the oil seal with a new unit.
|
| • |
When installing the new oil seal, use the specialized tool.
|
Oil seal installer both sides : 09431-26100
|
|
Handle both sides : 09231-H1100
|
|
|
| Concentric Slave Cylinder Air Bleeding
Procedure |
| 2. |
After disconnecting a cap from the concentric slave cylinder air bleeder,
insert a vinyl hose in the plug.
|
| 3. |
Refill the reservoir tank with the specified fluid.
| •
|
Use the specified fluid. Avoid mixing different brands
of fluid.
|
Specified fluid : SAE J1703 (DOT 3 or DOT 4)
|
|
|
|
| 4. |
Pump the clutch pedal about 10 times.
|
| 5. |
Loosen the air bleed screw (A) at hold down the clutch pedal to allow
air to escape from the clutch system. Then tighten the air bleed screw.
|
| 6. |
Repeat the step 2 - 4 until there is no bubble in the fluid.
|
Components
1. Control shaft complete
2. Manual transaxle case
3. Clutch housing
4. Back-up lamp switch
5. Manual transaxle support bracket
6...
General Information
1.
Check & Change intervals
Check
& Replenishment
Change
Capacity
Oil specification
Normal use
Severe Use
60,000 km / 4 years
(40,000 miles / 4years)
No service required
120,000 km
(80,000 miles)
1...
Other information:
Description
The A/C Pressure Transducer (APT) converts the pressure value of high pressure
line into voltage value after measuring it. By converted voltage value, engine
ECU controls the cooling fan by operating it high speed or low speed...
..
Categories
WARNING
To reduce the risk of an air bag deploying unexpectedly and causing serious
injury or death:
Do not hit or allow any objects to impact the locations where air bags
or sensors are installed.
Do not perform maintenance on or around the air bag sensors. If the location
or angle of the sensors is altered, the air bags may deploy when they should
not or may not deploy when they should.
Do not install bumper guards or replace the bumper with a nongenuine
HYUNDAI parts. This may adversely affect the collision and air bag deployment
performance.
Place the ignition switch in the LOCK/OFF or ACC position when the vehicle
is being towed to prevent inadvertent air bag deployment.
Have all air bag repairs conducted by an authorized HYUNDAI dealer.
read more


 Components and components location
 Manual Transaxle Fluid. General information