Hyundai Venue: Parking Brake System / Parking Brake Lever. Repair procedures
Hyundai Venue (QX) (2020-2025) Service Manual / Brake System / Parking Brake System / Parking Brake Lever. Repair procedures
| Removal |
| 1. |
Disconnect the negative (-) battery cable.
|
| 2. |
Release the parking brake.
|
| 3. |
Remove the floor console assembly.
(Refer to Body - "Floor Console")
|
| 4. |
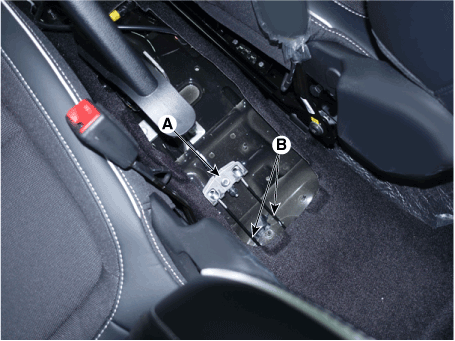
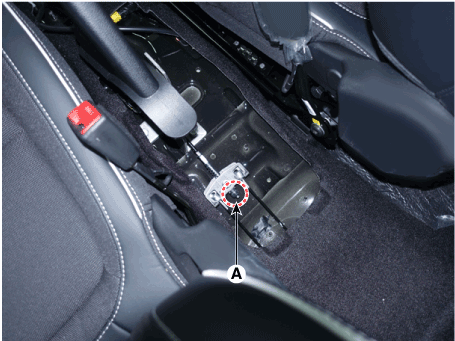
Disconnect the parking brake switch connector (A).
|

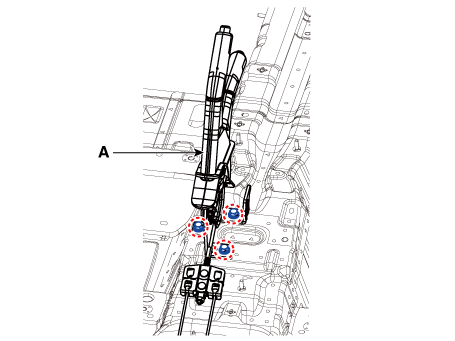
| 5. |
Separate the parking brake cable(B) from the Equalizer assembly (A).
|

| 6. |
Remove the parking brake lever assembly (A) after loosening the bolts.
|

| Installation |
| 1. |
Install the parking brake lever assembly.
|
| 2. |
Install the parking brake cable (B) to the equalizer assembly (A).
|
| 3. |
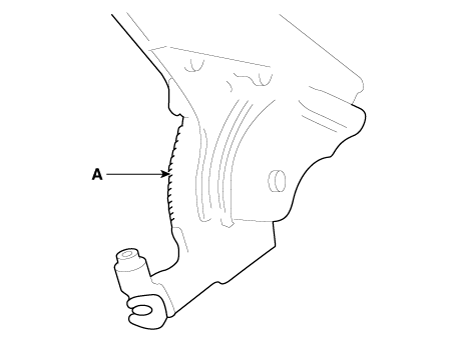
Apply a coating of the specified grease to each sliding parts (A) of
the ratchet plate or the ratchet pawl.
|
| 4. |
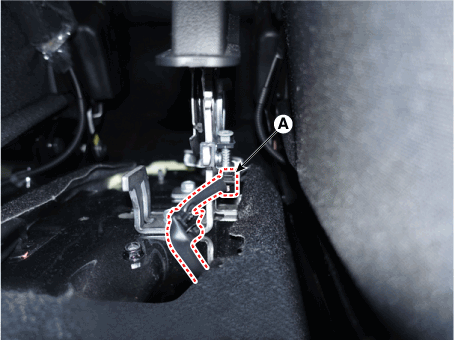
Install the parking brake cable adjuster, then adjust the parking brake
lever stroke by turning adjusting nut (A).
|


| 5. |
Connect the parking brake switch connector (A).
|
| 6. |
Install the floor console assembly.
(Refer to Body - "Floor Console")
|
| Adjustment |
| 1. |
Remove the floor console assembly.
(Refer to Body - "Floor Console")
|
| 2. |
Apply the brake pedal 20 times with the force of 10kgf after bleeding.
Then, for the cable to settle in, apply the parking brake full stroke
more than 3 times.
|
| 3. |
Install the parking brake cable adjuster, then adjust the parking brake
lever stroke by turning adjusting nut (A).
|
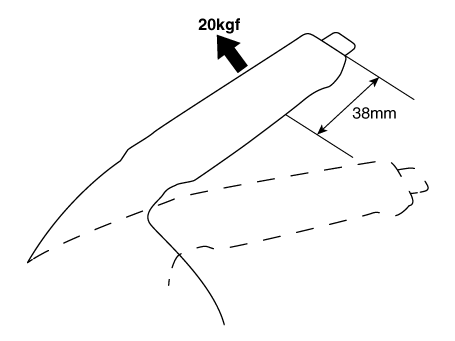
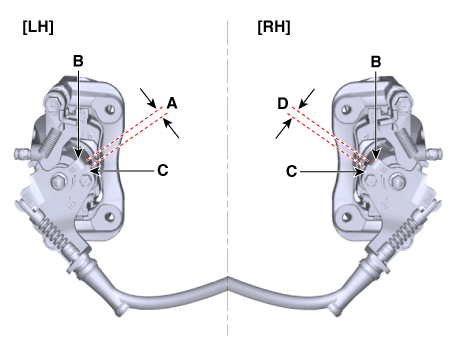
| 4. |
Tension the parking brake cable by tightening the adjusting nut, until
the operating levers on both calipers lift from the stop, up to a distance
of (A) and (D) between operating lever (B) and stopper (C).
|
| 5. |
Release the parking brake lever fully, and check that parking brakes
do not drag when the rear wheels are turned. Readjust if necessary.
|
| 6. |
Make sure that the parking brakes are fully applied when the parking
brake lever is pulled up fully.
|
| 7. |
Install the floor console.
(Refer to Body - "Floor Console")
|

 Parking Brake Switch. Repair procedures
Removal
1.
Turn ignition switch OFF and disconnect the negative (-) battery cable.
2.
Release the parking brake...
Other information:
Hyundai Venue (QX) (2020-2025) Service Manual: Fuel Filler Cap. Description and operation
Description A ratchet tightening device on the threaded fuel filler cap reduces the chances of incorrect installation, which seals the fuel filler. After the gasket on the fuel filler cap and the filler neck flange contact each other, the ratchet produces a loud clicking noise indicating the seal has been set...
Hyundai Venue (QX) (2020-2025) Service Manual: Front Door Outside Handle. Repair procedures
Replacement • When removing with a flat-tip screwdriver or remover,wrap protective tape around the tools to preventdamage to components...
Categories
- Manuals Home
- 1st Generation Venue Owners Manual
- 1st Generation Venue Service Manual
- Theft-Alarm System
- Vehicle Identification Number (vin), Vehicle Certification Label
- Child-Protector Rear Door Locks
- New on site
- Most important about car
Instrument Panel Overview
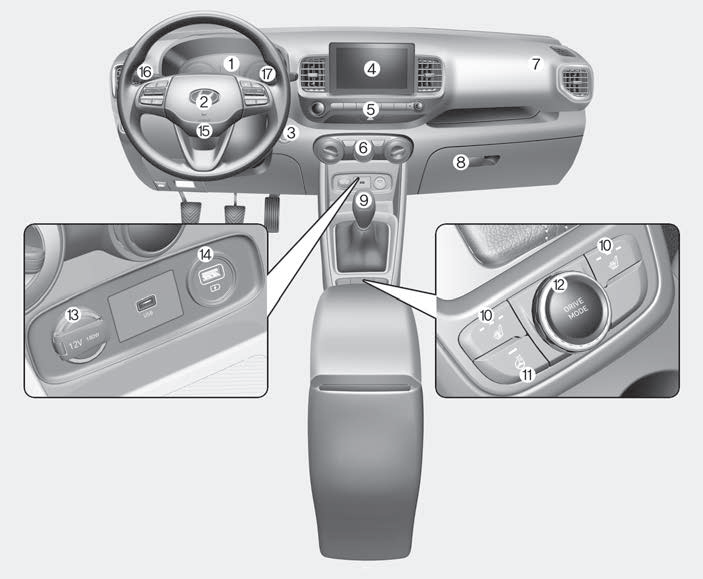
1. Instrument cluster
2. Horn
3. Key ignition switch/ Engine Start/Stop button
4. Infotainment system
5. Hazard warning flasher switch

Copyright © 2025 www.hvenueqx.com