Hyundai Venue: Brake Pad / Repair procedures
| Replacement |
[Front Brake Pad]
| 1. |
Loosen the wheel nuts slightly.
Raise the vehicle, and make sure it is securely supported.
|
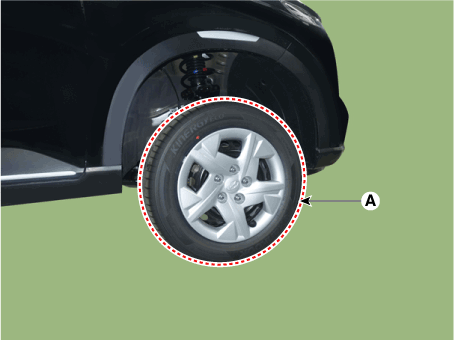
| 2. |
Remove the front wheel and tire (A) from front hub.
|


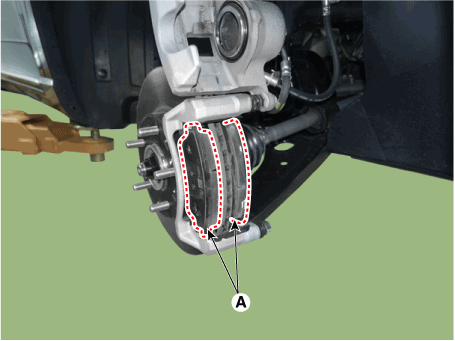
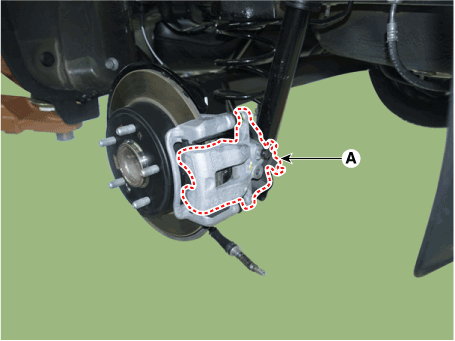
| 3. |
Up the caliper body (A) by loosening the guided rod bolt.
|

| 4. |
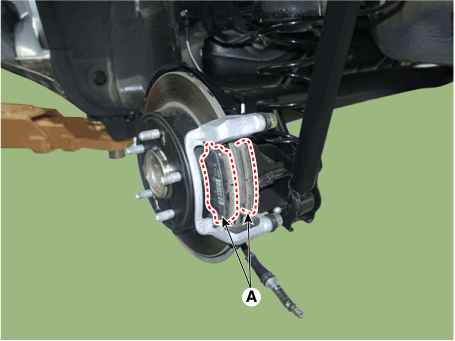
Remove the brake pad (A).
|
| 5. |
Replace the pad liner (A) with a new one.
|
| 6. |
Replace the brake pad (A) with a new one.
|


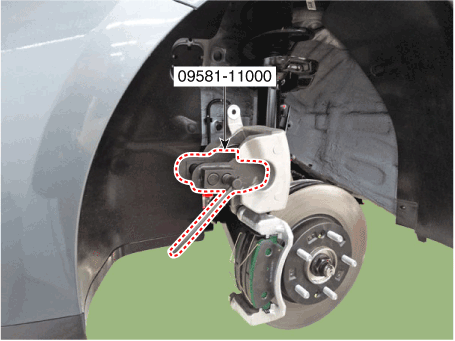
| 7. |
Use a SST (09581-11000) when installing the brake caliper assembly.
|
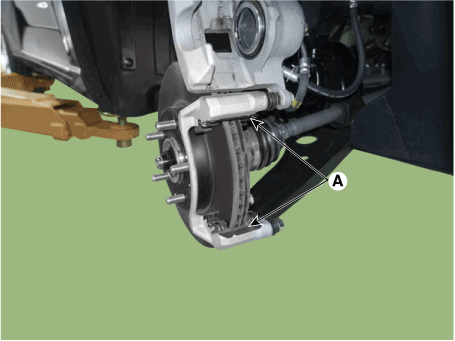
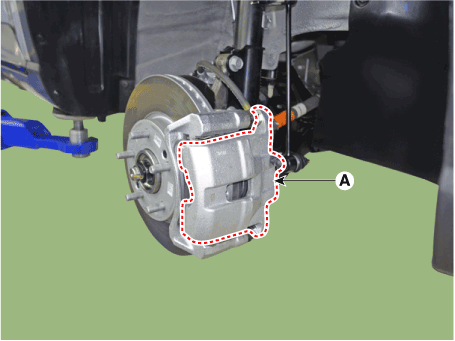
| 8. |
Install the caliper body (A) then tighten the guide rod bolt.
|
| 9. |
Install the front wheel and tire (A).
|

[Rear Brake Pad]
| 1. |
Loosen the wheel nuts slightly.
Raise the vehicle, and make sure it is securely supported.
|
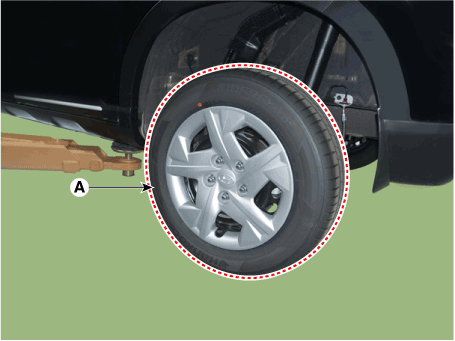
| 2. |
Remove the rear wheel and tire (A) from rear hub.
|

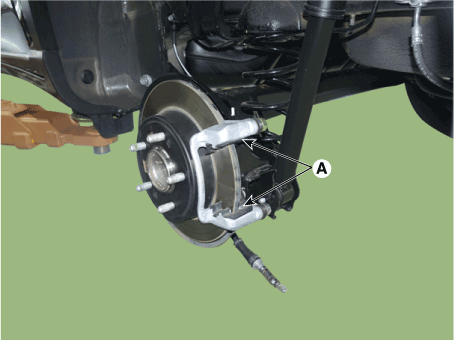
| 3. |
Disconnect the parking cable (B) after remove the parking brake cable
fixing clip (A).
|

| 4. |
Up the caliper body (A) by loosening the guided rod bolt.
|
| 5. |
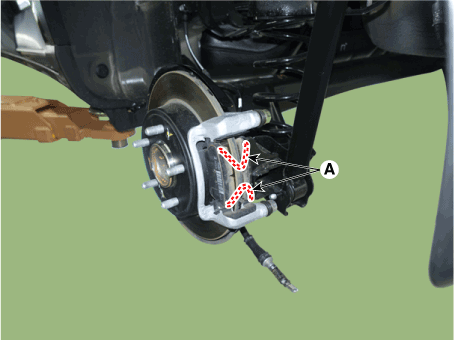
Remove the pad return spring (A).
|

| 6. |
Remove the brake pad (A).
|

| 7. |
Replace the pad pad liner (A) with a new one.
|
| 8. |
Replace the brake pad (A) with a new one.
|

| 9. |
Remove the pad return spring (A).
|

| 10. |
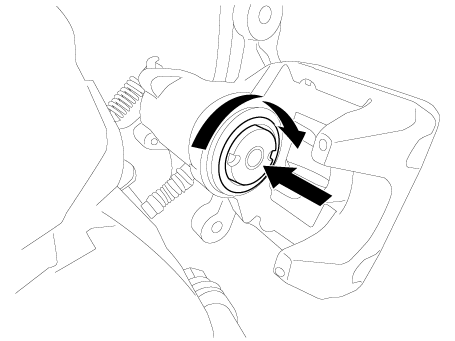
When installing, press and rotate the piston into the caliper body until
it is fully retracted.
|
| 11. |
Install the caliper body (A) then tighten the guide rod bolt.
|

| 12. |
Install the parking brake cable (B) and than fixing the clip (A).
|

| 13. |
Install the rear wheel and tire (A).
|


| Inspection |
Front Brake Pad Check
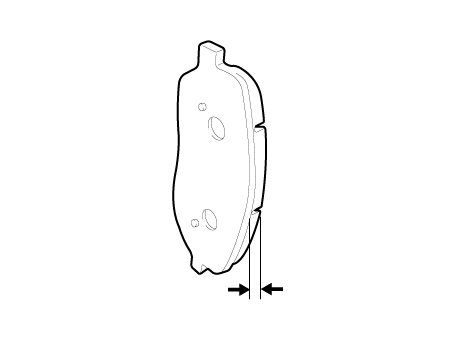
| 1. |
Check the pad wear. Measure the pad thickness and replace it, if it
is less than the specified value.
|
| 2. |
Check that grease is applied, to sliding contact points and the pad
and backing metal for damage.
|
Rear Brake Pad Check
| 1. |
Check the pad wear. Measure the pad thickness and replace it, if it
is less than the specified value.
|
| 2. |
Check the damage of pad, backing metal and contamination with grease.
|
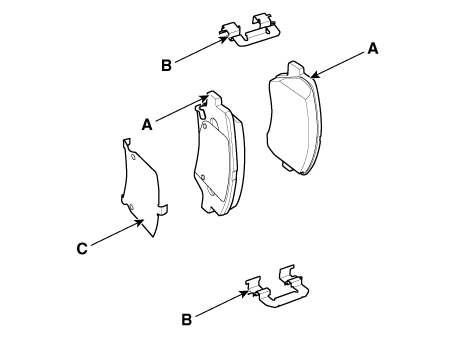
 Brake Pad
..

Other information:
Hyundai Venue (QX) (2020-2025) Service Manual: PTC Heater. Description and operation
Description The PTC (Positive Temperature Coefficient) heater is installed at the exit or the backside of heater core. The PTC heater is an electric heater using a PTC element as an auxiliary heating device that supplements deficiency of interior heat source in highly effective diesel engine...
Hyundai Venue (QX) (2020-2025) Owners Manual: Safety Precautions
Adjusting the seats so that you are sitting in a safe, comfortable position plays an important role in driver and passenger safety together with the seat belts and air bags in an accident. WARNING Do not use a cushion that reduces friction between the seat and the passenger...
Categories
- Manuals Home
- 1st Generation Venue Owners Manual
- 1st Generation Venue Service Manual
- Lighting control
- Type B, C
- Tire Pressure Monitoring System (TPMS) (Type A)
- New on site
- Most important about car
Fuel gauge

This gauge indicates the approximate amount of fuel remaining in the fuel tank.
Information
The fuel tank capacity is given in chapter 2. The fuel gauge is supplemented by a low fuel warning light, which will illuminate when the fuel tank is nearly empty. On inclines or curves, the fuel gauge pointer may fluctuate or the low fuel warning light may come on earlier than usual due to the movement of fuel in the tank.
Copyright © 2025 www.hvenueqx.com