Hyundai Venue: Windshield Glass / Repair procedures
Hyundai Venue (QX) (2020-2025) Service Manual / Body (Interior and Exterior) / Windshield Glass / Repair procedures
| Replacement |
[Removal]
|

|

| 1. |
Remove the roof side molding.
(Refer to Interior Trim - "Roof Side Molding")
|
| 2. |
Remove the inside rear view mirror assembly.
(Refer to Mirror - "Inside Rear View Mirror")
|
| 3. |
Remove the front pillar trim.
(Refer to Interior Trim - "Front Fillar Trim")
|
| 4. |
Remove the cowl top cover.
(Refer to "Cowl Top Cover")
|
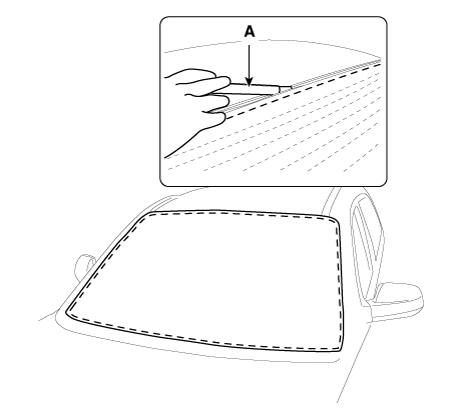
| 5. |
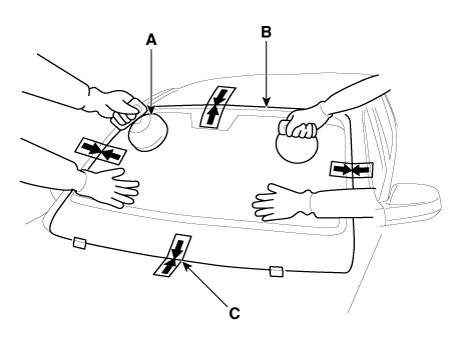
Using a cutter (A) knife, carefully remove the windshield glass molding.
|

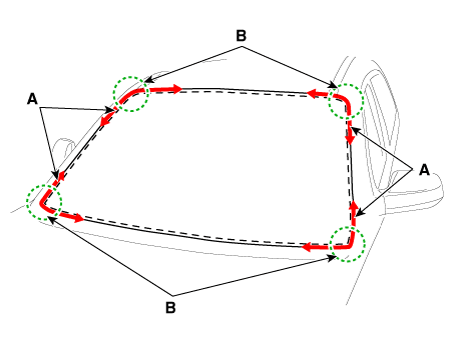
| 6. |
Cut off the sealant on the edge (B) while pulling the piano wire (A)
to the left and right.
|

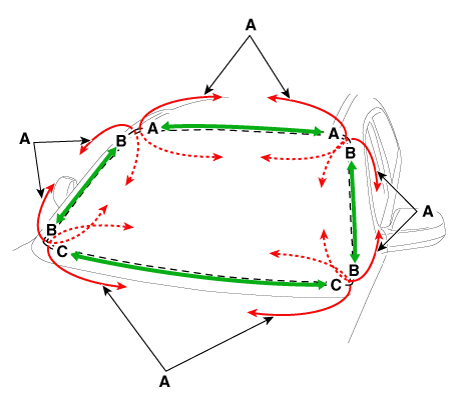
| 7. |
Cut off the sealant on (A-A), (B-B), (C-C), while pulling a piano wire
(A) to the left and right.
|

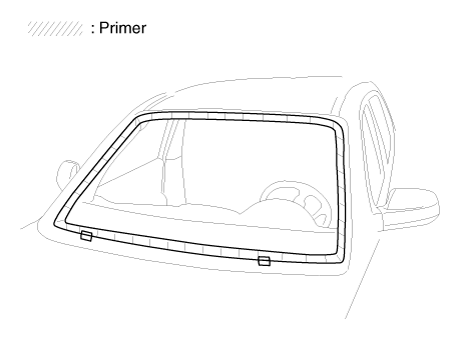
| 8. |
Remove the windshield glass (B) carefully using the glass holder (A).
|
[Installtion]
| 1. |
Using a knife, scrape the remaining sealant around the body panel leaving
about 2mm-thick sealant (0.0079 in.) on the bonding surface. If installing
a new windshield glass, make alignment marks on the windshield glass
and the body.
|


| 2. |
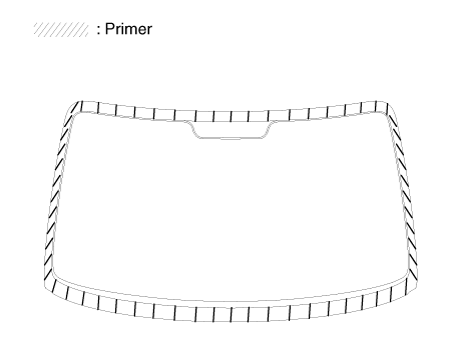
Clean the edges of body panel and windshield glass with alcohol. Apply
glass primer to the edges of windshield glass.
|
| 3. |
Apply the body primer to the bonding surface of body panel.
|

| 4. |
Apply the glass primer to the outer edge of windshield glass.
|

| 5. |
Apply a bead of sealant (B) around the windshield glass (A).
|

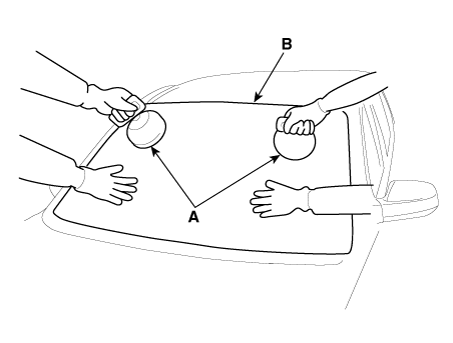
| 6. |
Using the glass holder (A), adjust the windshield glass (B) to fit the
alignment marks (C) on the body and lightly push the windshield glass
to make the edges fully seated on the bonding surface of body.
|
| 7. |
To make sure that the applied sealant is completely hardened, leave
the car on a flat surface for at least 4 hours after installing the
windshield glass.
|

| 8. |
Conduct a leak testing.
|
| 9. |
Install the cowl top cover.
(Refer to "Cowl Top Cover")
|
| 10. |
Install the roof side molding.
(Refer to Interior Trim - "Roof Side Molding")
|
| 11. |
Install the inside rear view mirror assembly.
(Refer to Mirror - "Inside Rear View Mirror")
|
| 12. |
Install the front pillar trim.
(Refer to Interior Trim - "Front Pillar Trim")
|


Other information:
Hyundai Venue (QX) (2020-2025) Owners Manual: Normal Maintenance Schedule
I : Inspect and if necessary, adjust, correct, clean or replace. R : Replace or change. *1 : The drive belt should be replaced when cracks occur or tension is reduced excessively. *2 : If TOP TIER Detergent Gasoline is not available, one bottle of additive is recommended...
Hyundai Venue (QX) (2020-2025) Owners Manual: Explanation of Scheduled Maintenance Items
Engine Oil and Filter The engine oil and filter should be changed at the intervals specified in the maintenance schedule. If the vehicle is being driven in severe conditions, more frequent oil and filter changes are required. Drive Belts Inspect all drive belts for evidence of cuts, cracks, excessive wear or oil saturation and replace if necessary...
Categories
- Manuals Home
- 1st Generation Venue Owners Manual
- 1st Generation Venue Service Manual
- Check Tire Pressure
- Automatic Door Lock and Unlock Features
- Immobilizer System
- New on site
- Most important about car
Fuel gauge
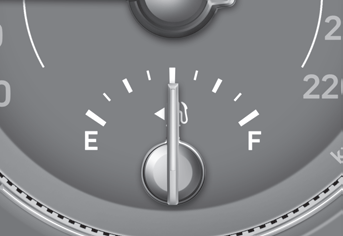
This gauge indicates the approximate amount of fuel remaining in the fuel tank.
Information
The fuel tank capacity is given in chapter 2. The fuel gauge is supplemented by a low fuel warning light, which will illuminate when the fuel tank is nearly empty. On inclines or curves, the fuel gauge pointer may fluctuate or the low fuel warning light may come on earlier than usual due to the movement of fuel in the tank.
Copyright © 2025 www.hvenueqx.com