Hyundai Venue: Crash Pad / Center Fascia Panel. Repair procedures
Hyundai Venue (QX) (2020-2025) Service Manual / Body (Interior and Exterior) / Crash Pad / Center Fascia Panel. Repair procedures
| Replacement |
|

| 1. |
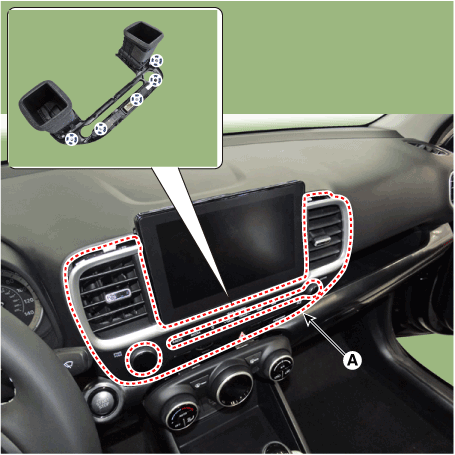
Using a flat-tip screwdriver and remove the center fascia panel (A).
|
| 2. |
Press the lock pin and separate the hazard switch connector (A).
|

| 3. |
To install, reverse the removal procedure.
|

 Cluster Fascia Panel. Repair procedures
Replacement
•
Put on gloves to prevent hand injuries...
 Crash Pad Lower Panel. Repair procedures
Replacement
•
Put on gloves to prevent hand injuries...
Other information:
Hyundai Venue (QX) (2020-2025) Service Manual: Drive Plate. Repair procedures
Removal and Installation 1. Remove the automatic transaxle. (Refer to Automatic Transaxle System - "Automatic Transaxle") 2. Remove the drive plate(A). Tightening torque : 71...
Hyundai Venue (QX) (2020-2025) Service Manual: Brake bleeding procedures
Brake System Bleeding Nomal Brake System • Do not reuse the drained fluid. • Always use genuine DOT4 brake Fluid...
Categories
- Manuals Home
- 1st Generation Venue Owners Manual
- 1st Generation Venue Service Manual
- Remote Key
- System Setting and Activation
- Liftgate
- New on site
- Most important about car
Fuel gauge
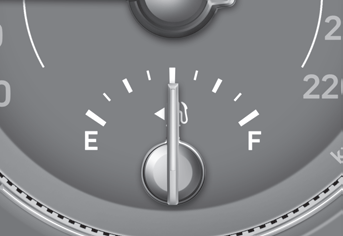
This gauge indicates the approximate amount of fuel remaining in the fuel tank.
Information
The fuel tank capacity is given in chapter 2. The fuel gauge is supplemented by a low fuel warning light, which will illuminate when the fuel tank is nearly empty. On inclines or curves, the fuel gauge pointer may fluctuate or the low fuel warning light may come on earlier than usual due to the movement of fuel in the tank.
Copyright © 2025 www.hvenueqx.com