Hyundai Venue: Automatic Transaxle Control System / Shift Lever. Repair procedures
Hyundai Venue (QX) (2020-2025) Service Manual / Automatic Transaxle System / Automatic Transaxle Control System / Shift Lever. Repair procedures
| Removal |
| 1. |
Turn ignition switch OFF and disconnect the negative (-) battery cable.
|
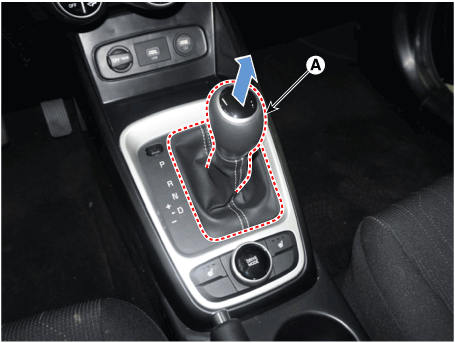
| 2. |
Pull the knob (A) in the direction of "F" and remove the knob.
|
| 3. |
Remove the floor console assembly.
(Refer to Body - "Floor Console")
|
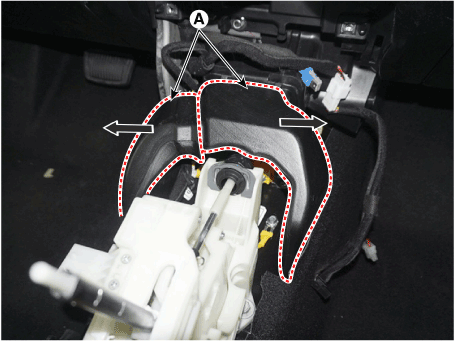
| 4. |
Separate the clip (A) of fixied wiring.
|
| 5. |
Disconnect the connector (B).
|

| 6. |
Separate the air duct (A) from the both side.
|
| 7. |
Separate the shift cable.
|
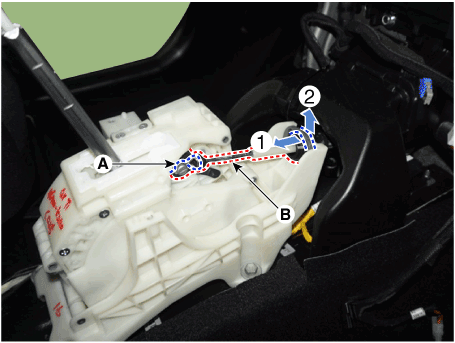

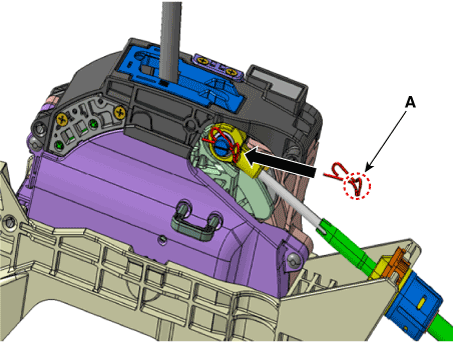
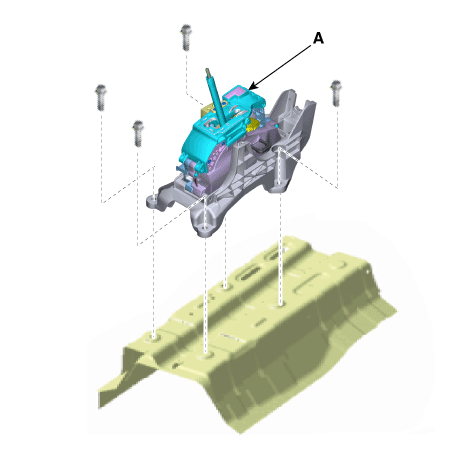
| 8. |
Remove the bolts and then shift lever assembly (A).
|
| Installation |
| 1. |
To install, reverse the removal procedure.
|

 Shift Lever. Components and components location
Components Location
1. Shift lever knob & boots
2. Shift lever assembly
3. Shift cable
4. Manual control lever
5...
 Shift Cable. Components and components location
Components Location
1. Shift lever knob & boots
2. Shift lever assembly
3. Shift cable
4. Manual control lever
5...
Other information:
Hyundai Venue (QX) (2020-2025) Service Manual: Speakers. Repair procedures
Inspection 1. Troubleshooting for Speaker (1) Basic inspection of speaker Inspect the sound from speaker after verifying that the speaker mounting screws is removed and the wiring connector is connected precisely to remove vibration transmitted from body trims and surrounding parts...
Hyundai Venue (QX) (2020-2025) Owners Manual: Safety Precautions
Adjusting the seats so that you are sitting in a safe, comfortable position plays an important role in driver and passenger safety together with the seat belts and air bags in an accident. WARNING Do not use a cushion that reduces friction between the seat and the passenger...
Categories
- Manuals Home
- 1st Generation Venue Owners Manual
- 1st Generation Venue Service Manual
- Vehicle Identification Number (vin), Vehicle Certification Label
- Rear Combination Light Bulb Replacement
- Immobilizer System
- New on site
- Most important about car
Air bag collision sensors
WARNING
To reduce the risk of an air bag deploying unexpectedly and causing serious injury or death:
Do not hit or allow any objects to impact the locations where air bags or sensors are installed. Do not perform maintenance on or around the air bag sensors. If the location or angle of the sensors is altered, the air bags may deploy when they should not or may not deploy when they should. Do not install bumper guards or replace the bumper with a nongenuine HYUNDAI parts. This may adversely affect the collision and air bag deployment performance. Place the ignition switch in the LOCK/OFF or ACC position when the vehicle is being towed to prevent inadvertent air bag deployment. Have all air bag repairs conducted by an authorized HYUNDAI dealer.

Copyright © 2025 www.hvenueqx.com