Hyundai Venue: Heater / Heater Unit. Repair procedures
Hyundai Venue (QX) (2020-2025) Service Manual / Heating, Ventilation and Air Conditioning / Heater / Heater Unit. Repair procedures
| Replacement |
| 1. |
Disconnect the negative (-) battery terminal.
|
| 2. |
Recover the refrigerant with a recovery / recycling / charging station.
|
| 3. |
When the engine is cool, drain the engine coolant from the radiator.
(Refer to Engine Mechanical System - "Coolant")
|
| 4. |
Remove the engine cover.
(Refer to Engine Mechanical System - "Engine Cover")
|
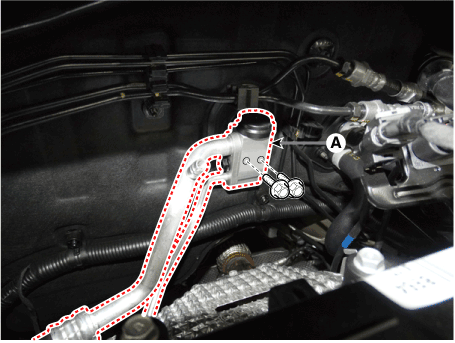
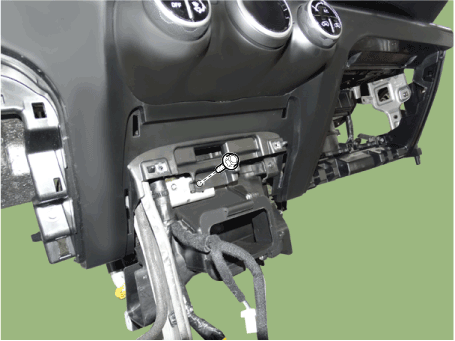
| 5. |
Remove the bolts and the expansion valve (A) from the evaporator core.
|
| 6. |
Remove the bolts and the expansion valve (A) from the evaporator core.
|

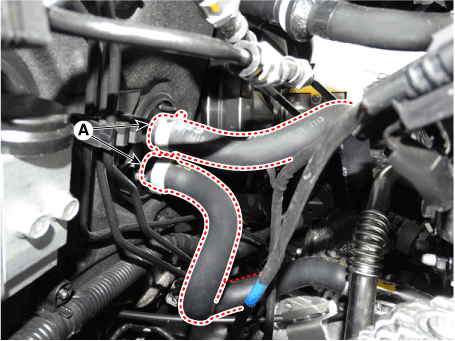
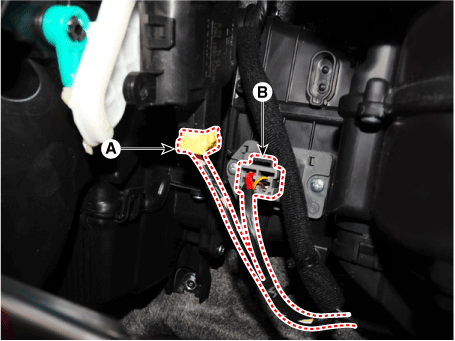
| 7. |
Press the lock pin and separate the heater hoses (A) from the heater
unit.
|

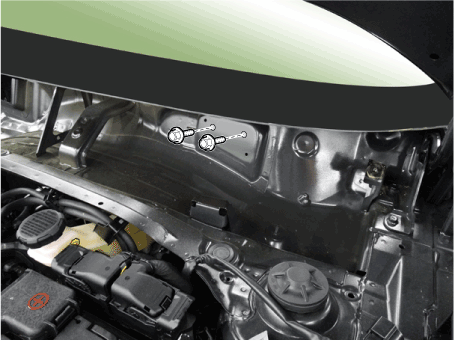
| 8. |
Loosen the cowl cross member mounting bolts.
|
| 9. |
Remove both sides of the front pillar trim.
(Refer to Body - "Front Pillar Trim")
|
| 10. |
Remove the floor console assembly.
(Refer to Body - "Floor Console Assembly")
|
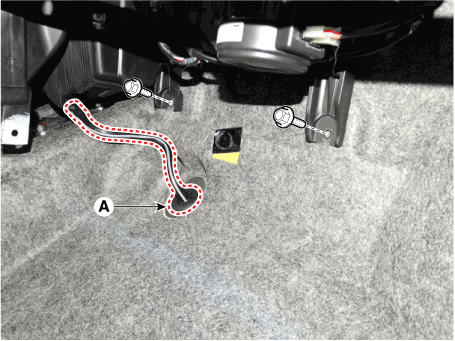
| 11. |
Remove the front air duct (A).
|
| 12. |
Remove the cowl side trim.
(Refer to Body - "Cowl Side Trim")
|
| 13. |
Remove the shift lever assembly.
(Refer to Automatic Transmission System - "Shift Lever")
|
| 14. |
Remove the crash pad lower panel.
(Refer to Body - "Crash Pad Lower Panel")
|
| 15. |
Remove the steering column shroud lower panel.
(Refer to Body - "Steering Column Shroud Panel")
|
| 16. |
Remove the steering wheel.
(Refer to Steering System - "Steering Wheel")
|
| 17. |
Remove the multifunction switch.
(Refer to Body Electrical System - "Multifunction Switch")
|
| 18. |
Lower the steering column after loosening the mounting bolts.
(Refer to Steering System - "Steering Column and Shaft")
|
| 19. |
Remove the glove box.
(Refer to Body - "Glove Box")
|
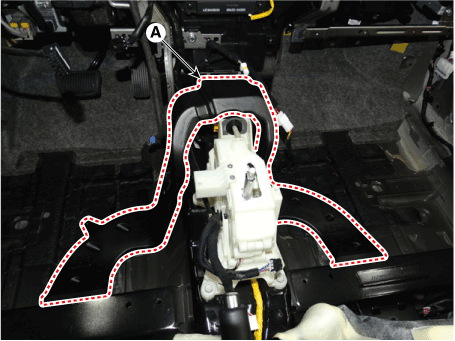
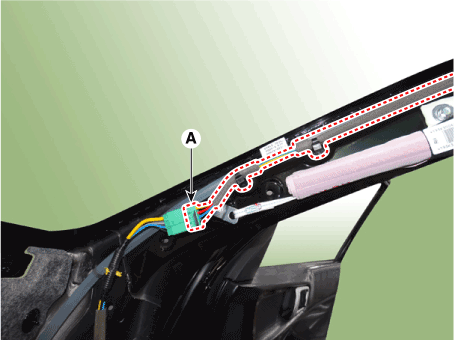
| 20. |
Disconnect the airbag control module (SRSCM) connector (A).
|

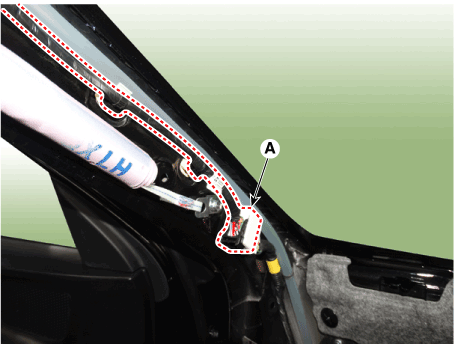
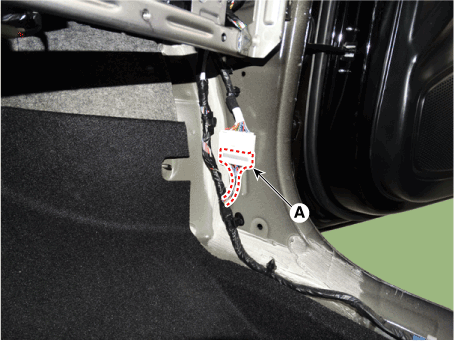
| 21. |
Disconnect the connectors (A) and the mounting clips in the front pillar.
[LH]
[RH]
|
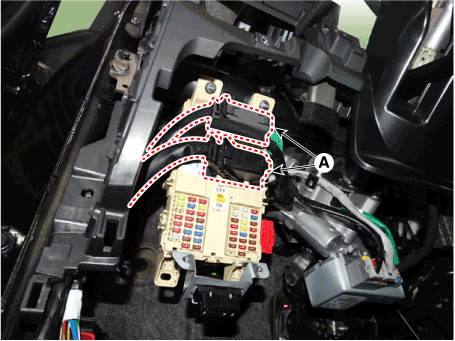
| 22. |
Disconnect the junction box connectors (A).
|
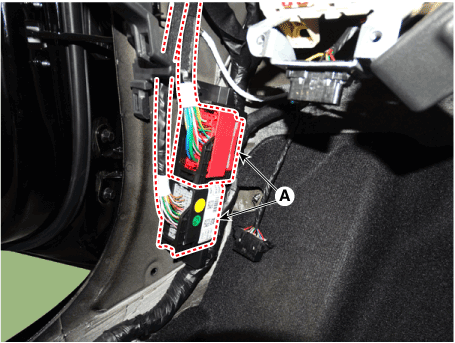
| 23. |
Disconnect the multi box connectors (A).
[LH]
[RH]
|
| 24. |
Disconnect the heater & blower unit connectors.
[LH]
[RH]
|
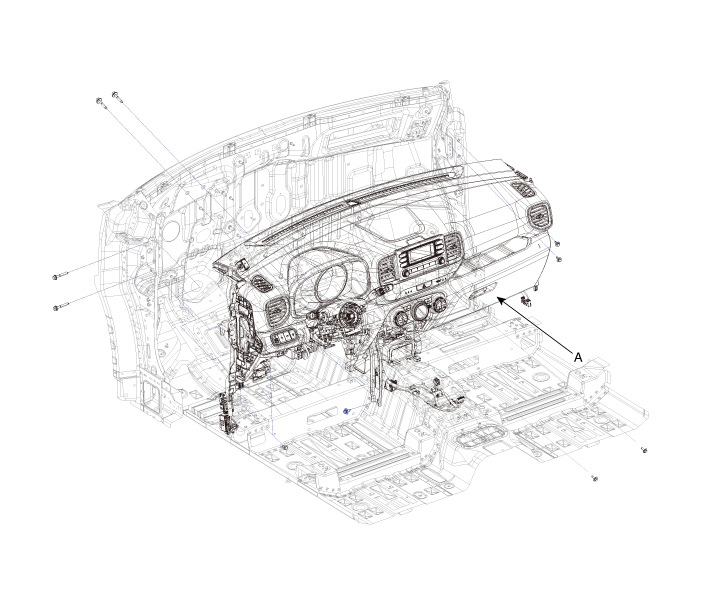
| 25. |
Loosen the bolts and remove the main crash pad and cowl cross bar assembly
(A) together.
|
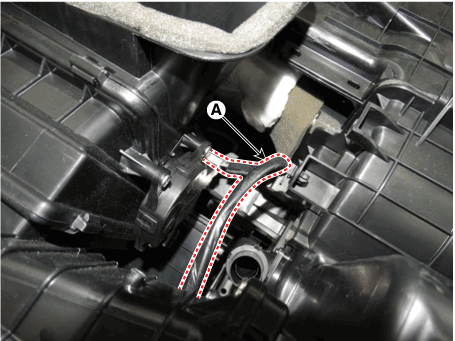
| 26. |
Press the lock pin and disconnect the intake actuator (A).
|
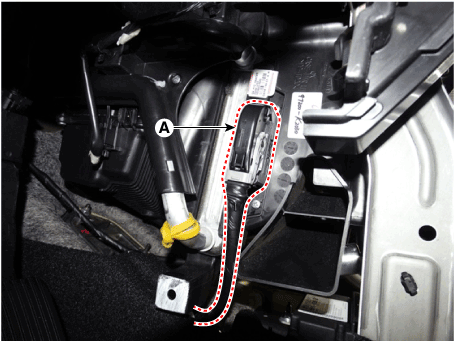
| 27. |
Loosen the heater & blower unit mounting bolt.
|
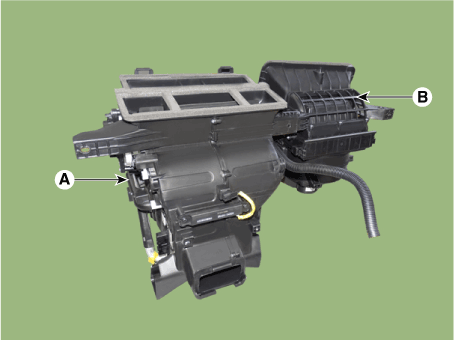
| 28. |
Loosen the mounting nuts and remove the heater & blower unit (A) from
the crash pad.
|

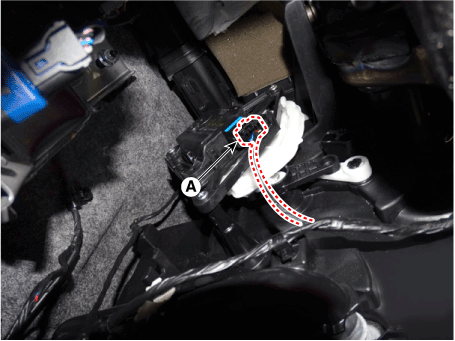
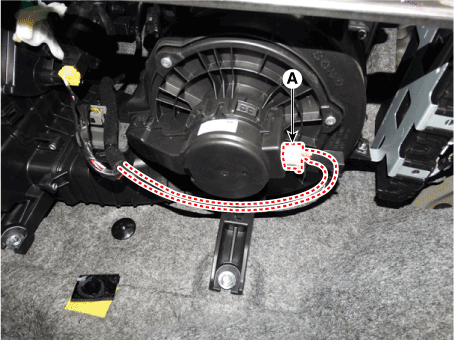
| 29. |
Loosen the mounting screw and separate the heater unit (B) from the
blower unit (A).
|
| 30. |
Install in the reverse order of removal.
|
 Heater Unit. Components and components location
Component Location
1. Heater unit assembly
Compoents
1. Mode control actuator
2...
 Heater Core. Repair procedures
Replacement
1.
Remove the heater unit assembly.
(Refer to Heater - "Heater Unit")
2...
Other information:
Hyundai Venue (QX) (2020-2025) Service Manual: Sunroof Sunshade. Repair procedures
Replacement 1. Remove the sunroof assembly. (Refer to Sunroof - "Sunroof Assembly") 2. Remove the stopper (A) by pushing it in the direction of the arrow. 3...
Hyundai Venue (QX) (2020-2025) Service Manual: Rear Wheel Guard. Repair procedures
Replacement • Put on gloves to prevent hand injuries. • When removing with a flat-tip screwdriver or remover, wrap protective tape around the tools to prevent damage to components...
Categories
- Manuals Home
- 1st Generation Venue Owners Manual
- 1st Generation Venue Service Manual
- Automatic Door Lock and Unlock Features
- Check Tire Pressure
- Rear Combination Light Bulb Replacement
- New on site
- Most important about car
Fuel gauge
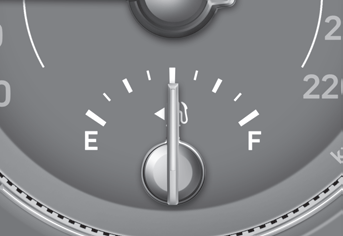
This gauge indicates the approximate amount of fuel remaining in the fuel tank.
Information
The fuel tank capacity is given in chapter 2. The fuel gauge is supplemented by a low fuel warning light, which will illuminate when the fuel tank is nearly empty. On inclines or curves, the fuel gauge pointer may fluctuate or the low fuel warning light may come on earlier than usual due to the movement of fuel in the tank.
Copyright © 2025 www.hvenueqx.com